
A Client's Experience From Start to Finish
If you've been scrolling through my gallery and thinking "I would love to do that, but I have no idea what I'm getting myself into," this post is for you. An underwater photoshoot is unlike any other photography experience. There's no standing awkwardly in front of a camera while someone tells you to smile. It's immersive, freeing, and honestly a little magical once you find your flow in the water. But I know that the unknown can feel daunting, so I want to walk you through exactly what happens, from your very first enquiry to the moment you walk away with images you'll treasure forever.
Step 1: We Have a Real Conversation First
When you reach out to me, the first thing I want to do is get on the phone with you. No obligation, no pressure. I want to answer your questions honestly, tell you what to expect, and get a sense of what you're hoping to create. If phone calls aren't your thing, that's completely fine. We can do everything over text or email. There's no wrong way to start. My session fee is $300, which covers the cost of renting the private pool and having a qualified safety swimmer on site. Once we've talked through everything and you're ready to go ahead, I'll send through an invoice and lock in your date.
Step 2: The Design Consultation
Where the Magic Starts
This is one of my favourite parts of the process, and it's something that sets my shoots apart. Before we ever get into the water together, we meet in person at a cafe, or at your place, wherever works for you. I bring everything with me: my backdrop samples, my full wardrobe of dresses, skirts, and flowing fabrics. You can try things on, see what you love, and we can make decisions together rather than guessing on the day.
We talk through everything:
• What you want from your shoot: the mood, the feeling, the vision
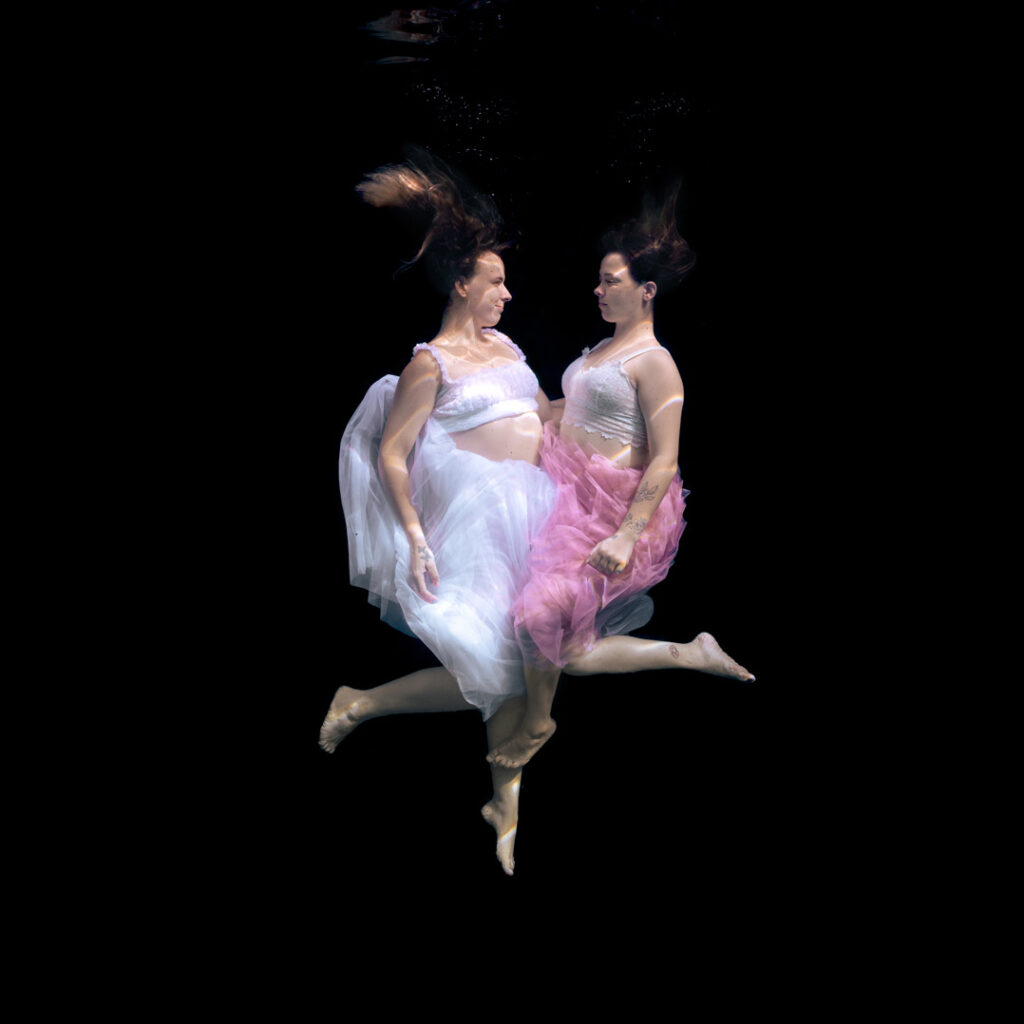
• Whether we're including a partner, children, or anyone else, and how to style everyone
• Poses, movement, and what to expect from your body in the water
• Practical things like the chlorine affecting your eyes (I bring eye drops, but feel free to bring your own), breathing techniques, and how to stay relaxed underwater
• Any nerves or concerns you have, because talking about them now means they won't hold you back on shoot day
I usually schedule the design consultation a few weeks before the shoot, which also gives you time to practice. I genuinely encourage you to hop in your own pool or a local creek and get comfortable with the feeling of being underwater. It makes a huge difference. By the time shoot day arrives, we're not strangers. You've already met me, we've already laughed together, and you know exactly what to expect. That comfort is everything when it comes to getting the best images.
Step 3: Shoot Day
What Actually Happens
We start at 7 am. I know, it sounds early, but the morning light through the water is absolutely worth it. I actually arrive at 6am to spend an hour setting up: getting the backdrops weighted and positioned, arranging the lighting, and making sure every detail is right before you arrive.
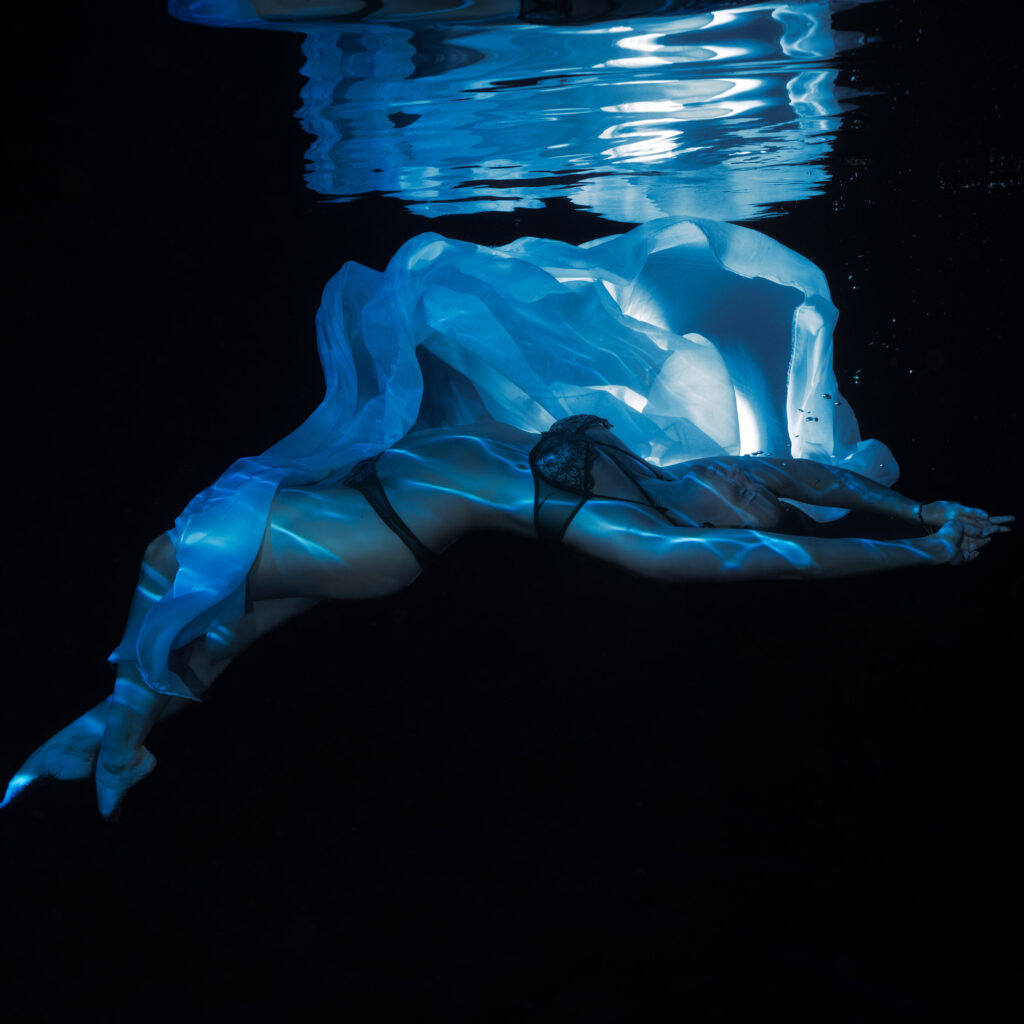
A note on night shoots: I also offer evening sessions for a completely different look: dark, moody, and dramatic. I've done underwater boudoir shoots at night that genuinely looked like a scene from Avatar with the creative lighting. If that sounds like your vibe, ask me about it.
Where we shoot: The pool I use is at Herb's Training and Swim School, located at 7 Palm Avenue, Portsmith. It's completely private with no public access. There are clean toilets and hot showers on site, and the pool is heated, so we can shoot year-round (the only things that stop us are torrential rain and lightning).
Before you arrive: Please eat something, even something small. Getting your blood sugar up makes a real difference to how you feel in the water. And bring a water bottle.
The Safety Briefing
We always start here. Before anyone gets in the water, I walk you through the exits and facilities, our safety signals (what to do if you're struggling and need help), and how to breathe, sink, and move with the water rather than fighting it. I also have O2 and a defibrillator on site, and I always have a qualified safety swimmer with a life ring in the water with us. Safety is never an afterthought.
Getting Into the Water
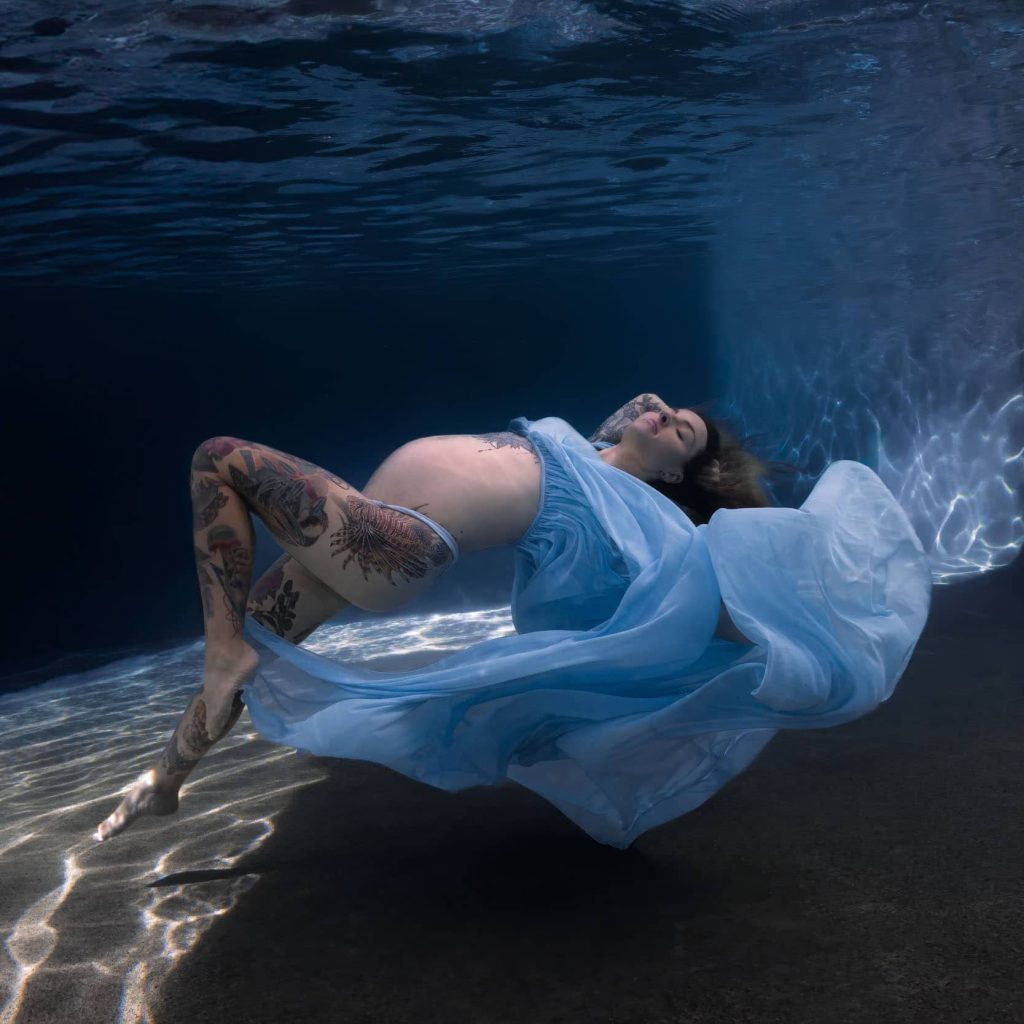
We always start in the shallow end. At 1.3 metres, most people can stand comfortably. The deep end is 3.5 metres, and we only go there if you're feeling confident and want to. In fact, 98% of my work happens in the shallow end. You do not need to be a strong swimmer to get stunning images. Here's something that surprises almost everyone: you don't need to be deep underwater for a beautiful photo. The closer you are to the surface, the better. That's what creates the gorgeous light and reflection you see in my work. We spend time learning how to hover just below the surface, not sink to the bottom.
Posing: It's a Learning Curve (and Then It Clicks)
I'll be honest with you: this isn't the easiest shoot to do. There is real time and practice that goes into it. You will get water up your nose. There may be burps and the occasional booger. But the results are absolutely worth it, and I am completely dedicated to making sure you have a positive experience from start to finish. The first 20 minutes will feel like a lot to take in. I'm reminding you to point your toes, relax your hands, soften your face, move with your fabric, control your breath. There's a lot happening at once. But here's what I've seen with every single client: there is always a moment where it clicks. It's like a light switch. And once it clicks, that's when we start getting the real images.
The progression usually looks like this:
- Sitting poses - the most accessible starting point
- Side-lying poses - very flattering and relatively easy to achieve
- Belly down - dynamic poses that rely on buoyancy
- Belly up - incredibly beautiful, especially for maternity shoots. Worth a heads up: every time you tip your head back, water will go up your nose. Some people don't mind it at all. If it bothers you, I have a nose plug called a Sinus Saver you can borrow.
- Vertical poses in deeper water - if you are up for it, it's often one of the easiest poses to execute and provides more creative freedom.
During the Shoot
You can have as many outfit changes as you like, and as many breaks as you need. I never rush you, and I never push you to do anything that doesn't feel right. I'll be in the water with you the whole time, coaching you through every pose.
A note on your eyes: If you're opening your eyes a lot in the pool, the chlorine will affect your vision by the end of the shoot. Things may be a little blurry and your eyes may be red. This clears up within a few hours, but please have a backup plan for getting home in case you can't drive straight away.
Makeup: Totally your call. I've written a full post about makeup for underwater photoshoots on my blog if you want guidance. Read it here.
Hair: Leave it loose. It moves beautifully underwater. If you want to wear something in your hair like a crown or flowers, use plenty of bobby pins to secure it.
On average, a shoot runs for 2 to 3 hours, but you can finish whenever you're ready. When we're done, you're welcome to take a hot shower while I pack everything up. I also love to take a selfie with my clients at the end. It's become a little tradition.
Step 4: The Reveal Session
A couple of days after your shoot, we meet again at a cafe or at your home, wherever suits you best. I show you a light edit of your images and you choose the ones you absolutely love. There's no pressure to buy everything. You only choose what genuinely moves you.
I offer a range of options: digital image packages, wall art, albums, and printed products. Personally, I am passionate about wall art and printed products. After everything you put into creating this experience, those images deserve to be something you see every day, not something sitting forgotten on a hard drive.
Every printed product you purchase also includes the digital file. Once you've chosen your favourites, I spend several more hours on each image, turning them from beautiful photos into genuine works of art. Please allow around 3 weeks for me to complete your images. No images are released until full payment has been received.
On average, most clients invest around $1,500 for a package of 12 images. Remember, this is artwork we are creating together, and I spend hours on each photo to make sure it's something truly extraordinary. Payment plans are available if you need them. You can see the full range of products and pricing on my Investment page here.
What My Clients Say
"Angelina creates such a safe and supportive environment, especially for anyone who might feel nervous in the water. My sister has a fear of water and was quite anxious beforehand, but Angelina took the time to gently guide us through each movement, explain everything clearly, and make sure we felt completely comfortable at our own pace. By the end of the session, my sister absolutely loved the experience and even said she would come back and do it again, which says everything!"
Hannah Gryphon.
"I had my maternity shoot at 33 weeks and felt super comfortable and safe in the water and not rushed. She took her time and made sure I was relaxed. I just received the pictures, and they are incredible. A lot of my friends have mentioned that they've never seen maternity photos like this before, and I love looking at them so much! This is something I will treasure forever."
Vanessa Mross.
"Angelina made me feel very comfortable and confident in front of the camera from the very beginning, which made such a difference. Her ability to capture movement and light underwater is truly impressive. The photos feel natural, soft, and effortlessly beautiful. The whole experience was calm, supportive, and really enjoyable."
Julia.
One Last Thing
At the end of the day, I love making people feel beautiful underwater, and I will do everything I can to make this an incredible experience for you. Underwater portraits are creative, fun, and so incredibly unique that every person I photograph should feel really proud of themselves afterwards. It's a brave thing to do something out of the ordinary, and I really hope I can keep showing people just how extraordinary underwater portrait photography in Cairns can be. If you're ready to take the plunge, or you just have questions, get in touch with me here. That first conversation costs you nothing.
Based in Cairns, Queensland. Available for pool portrait sessions, maternity, boudoir, family, and bridal shoots.
0 Comments